|
Step 1: Start by locating the passenger side fuse panel cover. 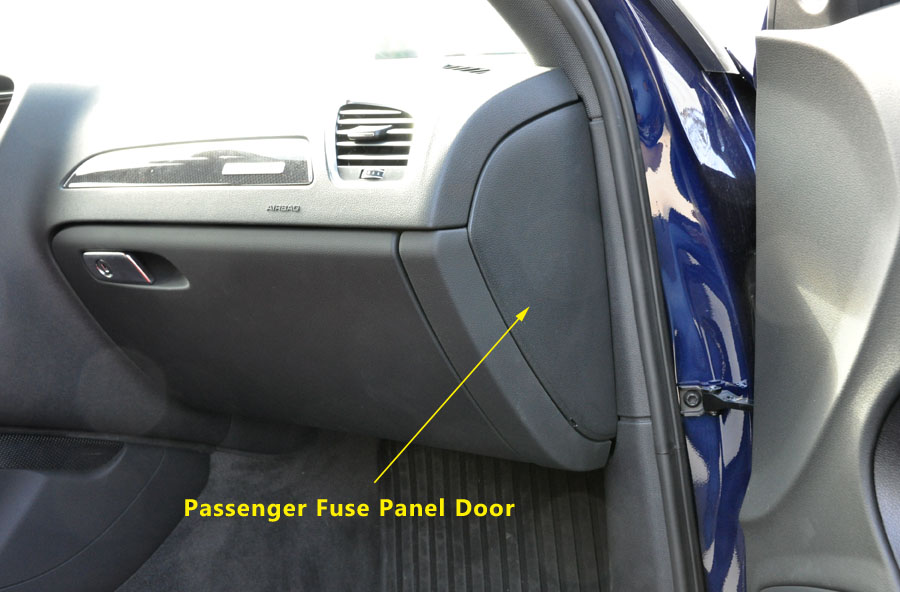
Now, remove the cover by gently prying at the notch. The panel is held in place with 3 clips, and pops off easily. 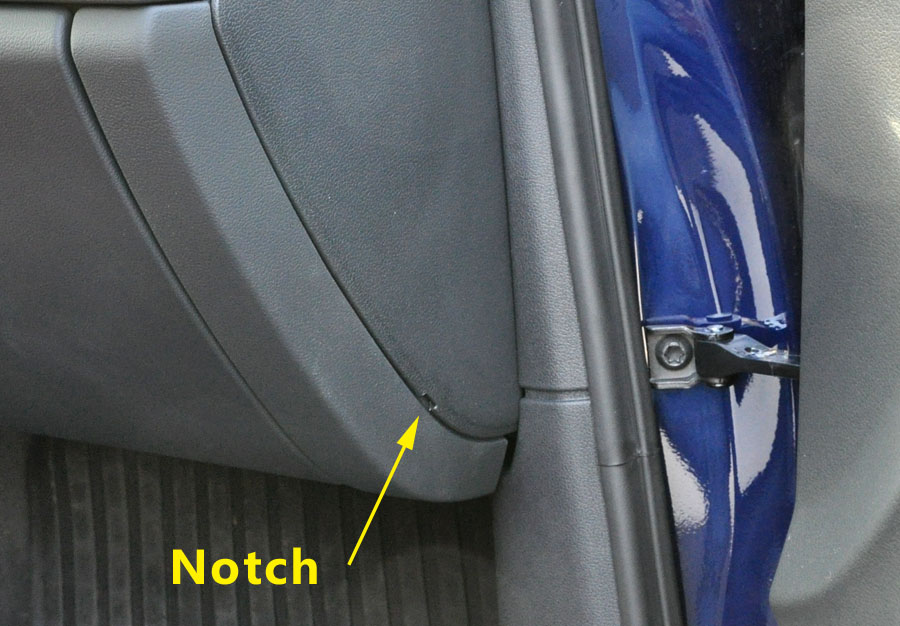
Step 2: Remove the purple fuse cover. It's held in place with clips at the top and bottom. Set the purple cover aside. 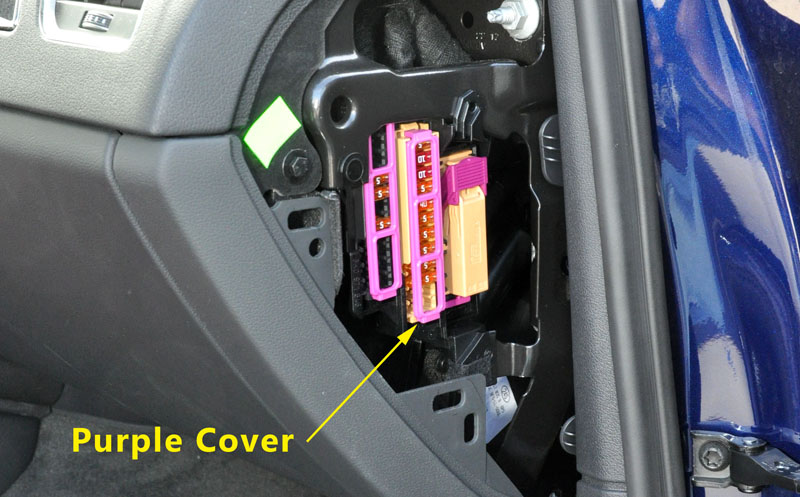
Note the empty slots in the fuse panel after the purple cover is removed. 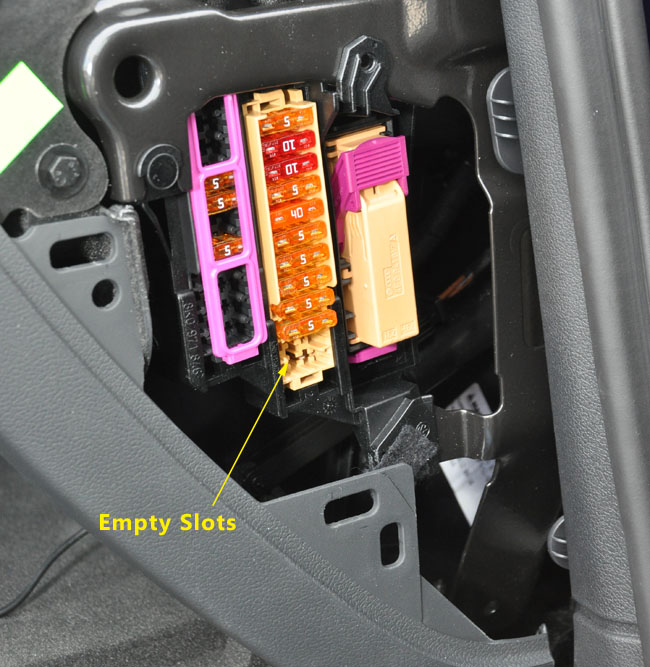
Step 3: Insert the fuse tap, with the installed fuse facing upward, into an open slot in the fuse panel. 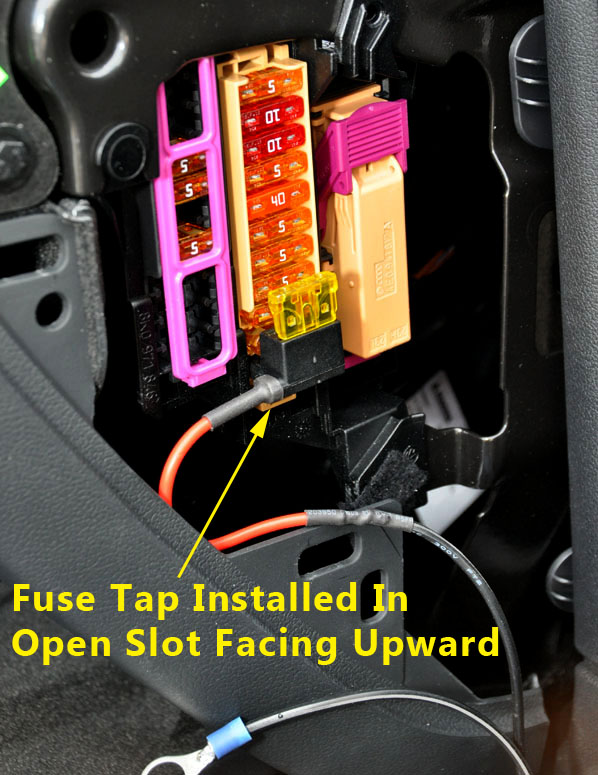
Note: The fuse slot referenced in the above picture should be treated as a starting point, and worked well for the vehicle used in this install guide. Different models, model years, and option packages within model years will yield different wiring options for each car. If the slot pictured does not work in your vehicle, try the slot pictured towards the bottom of this install guide, as sent in by user "Frank". If using a slot that is already occupied by a fuse, remove the fuse from the fuse block and insert it into the empty fuse slot in the power kit before pushing it into the fuse block. If neither of the suggested slots works for your vehicle, try other slots until you find one that works. A properly selected fuse slot should provide power when the car is on, but not provide power when the car is off and has shut down (usually 5-10 minutes after turning off the car, closing the doors, and locking the car). If the receiver stays powered all the time, it will eventually go into a "sleep" mode to conserve power and will require a disconnect/connect from the power kit to "wake" back up. If this is happening in your vehicle, the fuse slot you've chosen is providing power all the time. If the LED's on the receiver don't flash when first connected to the power kit after installation, the fuse slot isn't providing power. Step 4: Loosen and remove the nut from the stud at the top of the open fuse panel area. Place the ring terminal over the stud. Note the position of the wire, routed behind the metal dash frane. 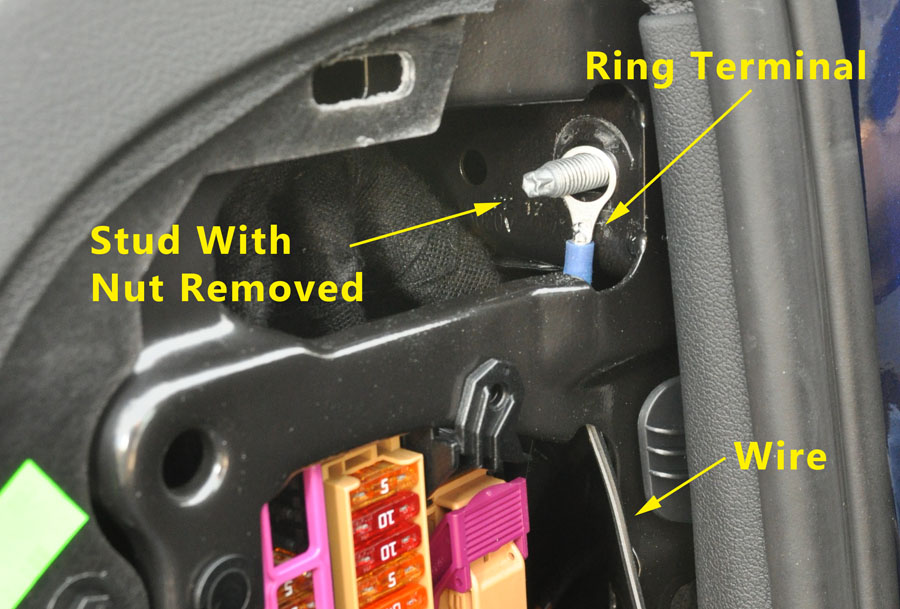
Reinstall the nut onto the stud. 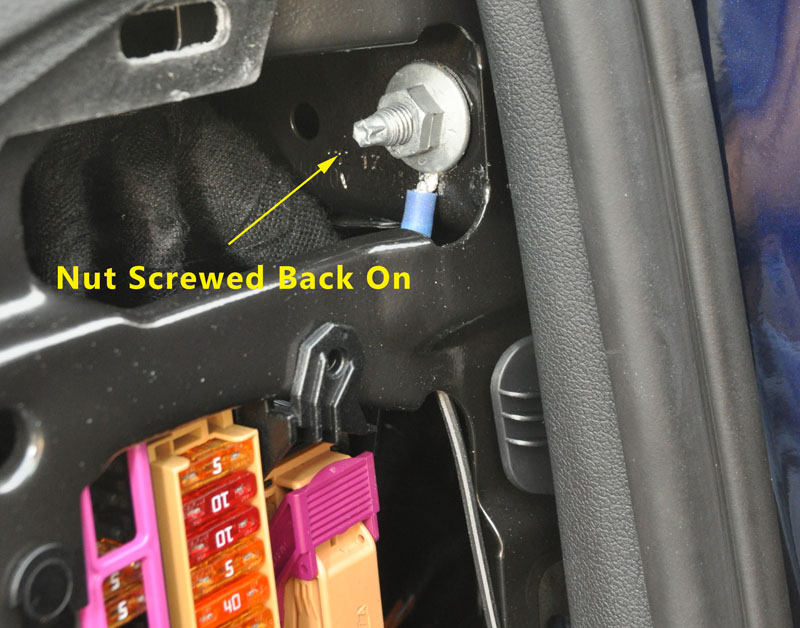
Step 5: Move to the inside of the glove box. Push the USB-connector end of the power injector cable through the hole next to the iPhone/iPod pocket with the USB-connector facing towards you. Push the connector all the way through. Move back to the fuse panel area, and as you push more of the wire through, work it around until you can see it drop into the fuse panel area where you can reach it. 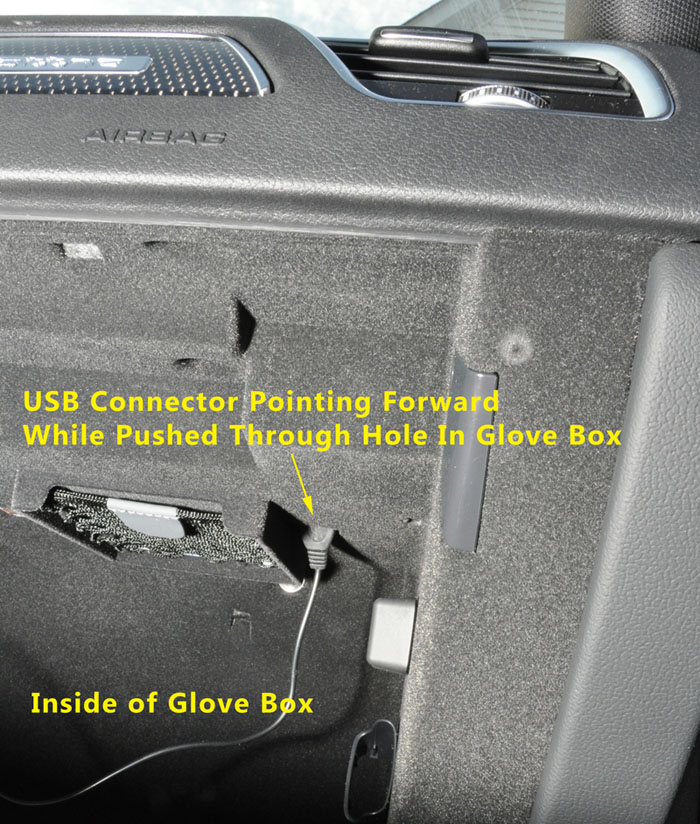
Move back to the inside of the glove box Plug the 30-pin Bluetooth A2DP Receiver into the power injector, and plug the power injector into the custom AMI AUX cable. Finally, plug the AMI AUX cable into the AMI socket in the glovebox. 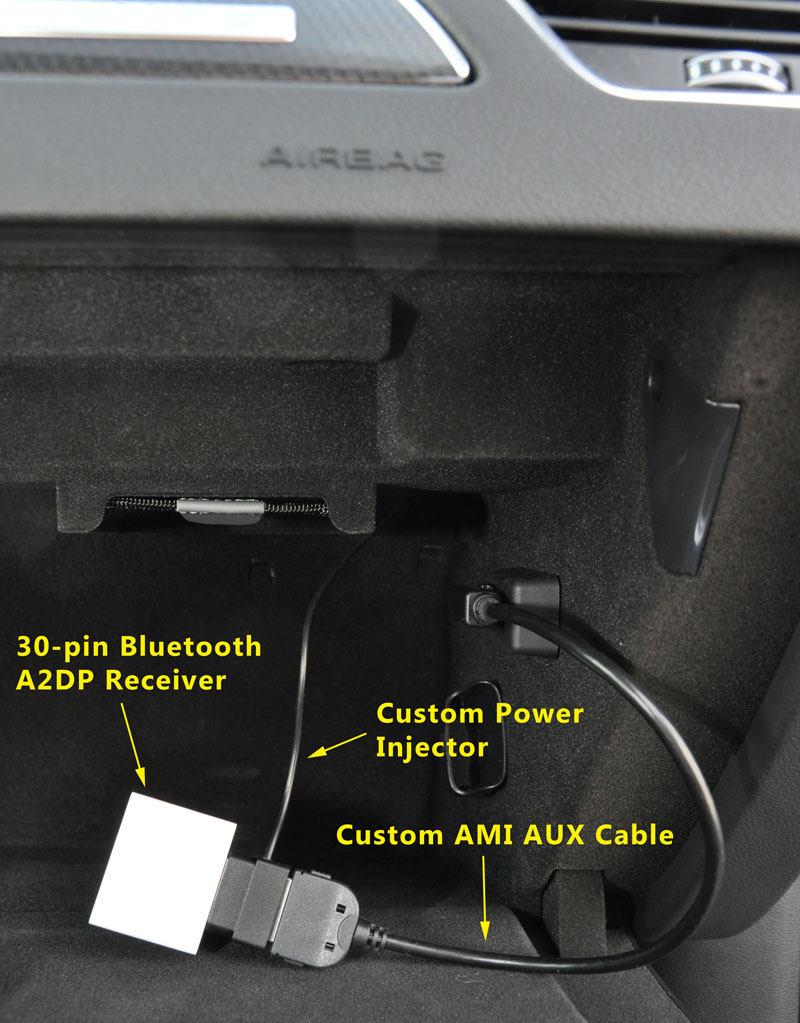
Step 6: Move back to the fuse panel area, and plug the USB connector you pushed through the hole in the glove box into the 5V adapter. 
Tuck the wires and socket/5V adapter into the cavity as pictured. You can use the included wire ties to snug everthing against the side of the cavity, keeping them away from the glove box hinge (wire ties not shown in the picture). 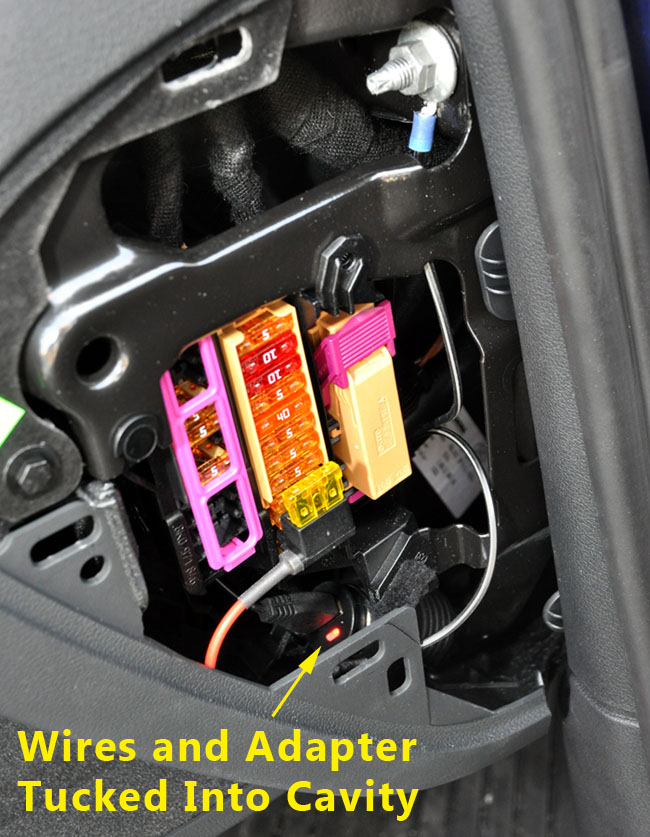
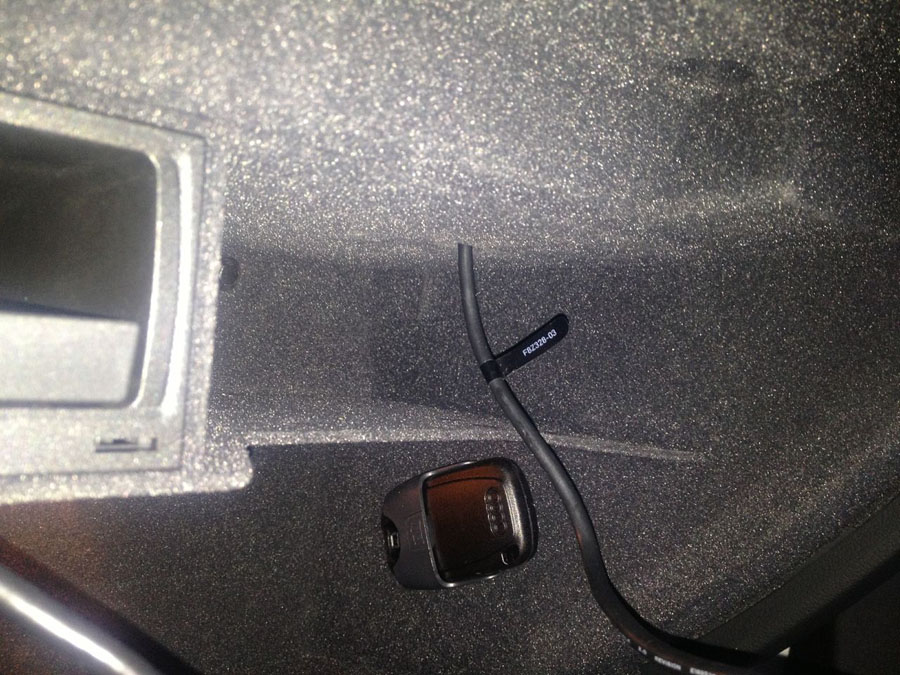
Step 7: Reinstall the fuse panel cover. You're done! Install Notes: These installation instructions depict an A4/S4. The exact location of the items referenced, and the items themselves may be different in your vehicle. If you don't have any available fuse slots, you can remove an existing fuse, insert it into the open slot on the fuse tap, and install the fuse tap where you removed the existing fuse from. This is how the fuse tap is designed to function, and both circuits will still be protected. If you don't have a hole in your glove box as pictured in these instructions, search around inside the glove box with a flashlight. Audi generally has several open holes in the glove box for different installed accessories. Any hole large enough to fit a USB connector through is sufficient. If you have no holes large enough to fit the connector through, an existing hole can be easily enlarged, in many cases with just your finger. The glovebox material is a thin plastic with a microfiber "glued on". Brandon was kind enough to share the below images from his non-nav 2012 A4, depicting where the USB cable routes through in his car: 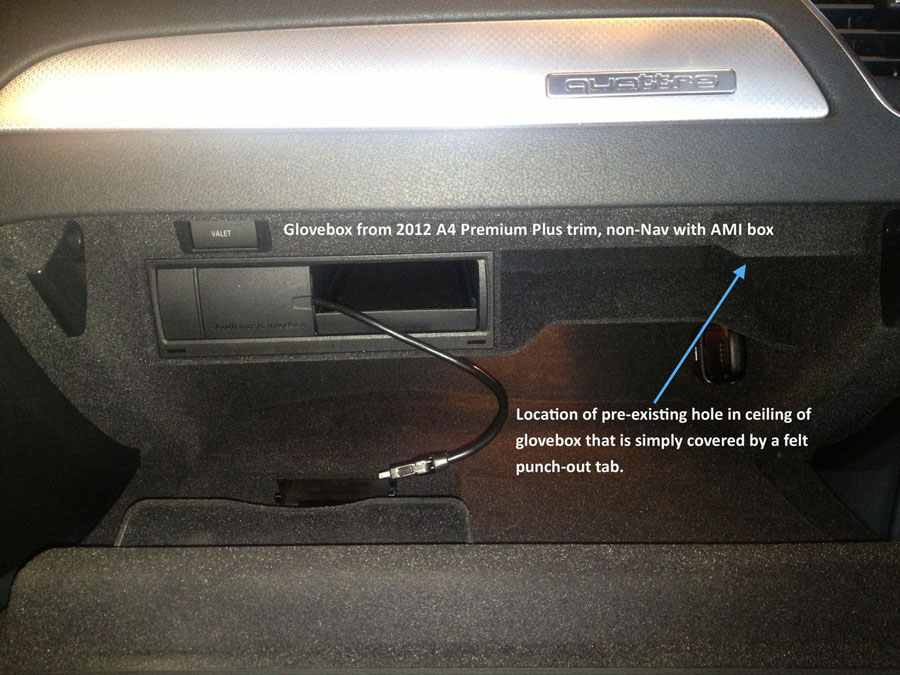
Thanks Brandon! Frank writes in to say that in his A4, the best switched slot to use was the 5th from the bottom on the block closest to the passenger seat. See the picture he provided below: 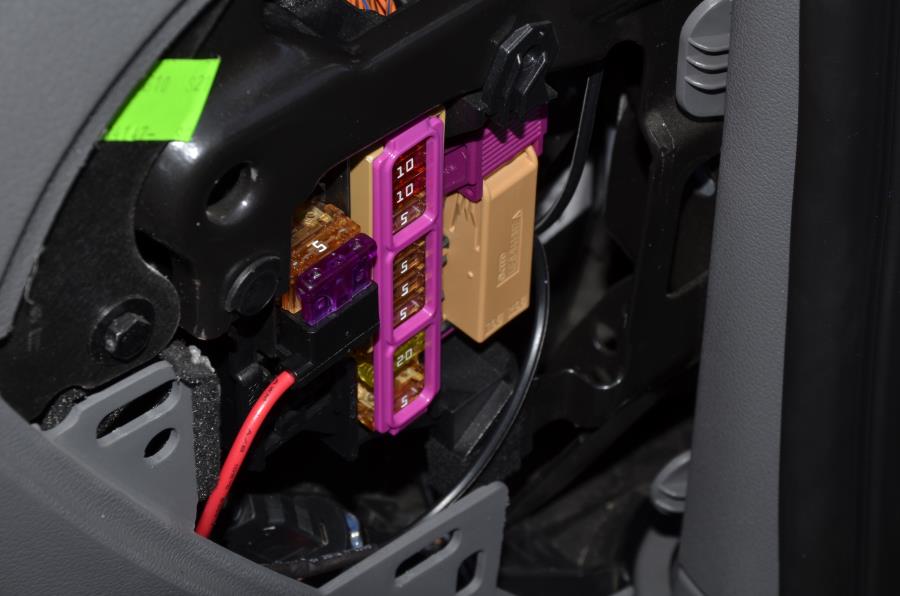
(note that when you're using a slot that already contains a fuse, the fuse you remove goes into the empty slot in the add-a-circuit before inserting it) Disclaimer: Installation is simple, but this kit does require direct connection to your vehicle's electrical system. Like any accessory, you are solely responsible for this kit's use and correct/safe installation in your vehicle. Any damage, injury, or any other loss or failure caused directly or indirectly by the use of this kit will not be my responsibility. |
[ Home ] [ FAQ ] [ Contact ] [ Testimonials ]